


Gently separate and extract excess material from your crop with the versatile Evolution Table from Harriston Industries. This reliable machine can be incorporated on any Clodhopper or other eliminator.

ABOUT
For 2017, the range of Evolution Separators has received a host of upgrades and improvements designed to reduce maintenance and increase performance.
An introduction to the range of Evolution Separators
The primary role is to gently separate clod, stones, haulm and loose soil from the following range of fruit, vegetables and alliums (although this list continues to grow):
- Potatoes
- Salad Potatoes
- Sweet Potatoes
- Onions
- Shallots
- Carrots
- Parsnips
- Celeriac
- Chicory
- Swedes
- Red Beet
- Brussels Sprouts
- Flower Bulbs
- Apples
- Bell Peppers
The Evolution Separator generally works by extracting the debris between 2 contra rotating rollers. The larger roller (spiral roller) has air chambers and is deformable with a spiralling rib. The smaller roller (clod roller) is smooth with a choice of finishes. The clever design of the “spiral rib” entrains the debris down into the valley between the rollers where, if the debris if soft enough is then crushed and ejected down below the separator. Stones will also pass between the rollers as the “spiral roller” readily deforms around the stone so does not allow loses of crop at this time. If larger stones enter the valley and there is not enough deformation in the spiral roller there is a safety mechanism that allows the clod roller to spring away momentarily to allow the stone to pass through.
Mobile Version Diagram

In-Store Version Diagram

IN-STORE OR MOBILE VERSIONS

In store: direct electric motor drive

Mobile: hydraulic drive with Kevlar V belts

SELF CLEANING
Self-cleaning of the unit achieved by the constant deforming of the spiral rollers, inertia and a fixed scraper mounted under each clod roller.
THE BEST FOR STONE PROTECTION
The large air chambers are essential for protection against stone damage to the protruding spiral rib by allowing the rib to deform around the stone.

TOTAL CONTROL
In order to vary the amount of separation and fine tune the separator for different crops / conditions, the unit is equipped with a host of easy to operate functions as listed:
- Speed control of the spiral roller shafts
- Speed and direction control of each pair of clod rollers
- Gap adjustment between each contra rotating pair of rollers (All gaps are adjusted in a single movement on each side)
- Height adjustment of clod rollers (all clod rollers lift at once)
- Angle adjustment of the separator
KEY FEATURES

DRIVE STYLES TO SUIT YOU
Direct drive electric motors– eliminates the need for chains, sprockets and guards (In store version)

ADJUSTMENTS MADE SIMPLE, ACCURATE & EFFECTIVE
Standard clod roller height control: turnbuckle (In store) or hydraulic ram (mobile version). All clod rollers are linked and raise/ lower together (8 row version is split 4 + 4).

Kevlar V belt drive (mobile version)

Clod rollers follow the ark of the spiral roller when raised/ lowered (all versions) and also feature a spring release safety mechanism. Clod roller gap adjustment is via the threaded adjuster (mobile version).

Clod roller gap adjustment moves all clod rollers equally with a single turn of the starwheel on each side (In store version).

Optional electric linear ram (In store)

Direct hydraulic motor drive (mobile version)

FEED ON/ OFF ROLLERS
The soft, low fluted transfer roller is also available as a feed on roller ideal for bridging gaps and presenting the crop better onto the separator (In store version)

BUILT WITH SAFETY IN MIND
Gas strut operated top guard for easy access, supplied with magnetic safety switch (In store version)

BETTER CLEANING AND HARDER WEARING
Choice of air chamber equipped spiral roller segments available in: 4 x 6mm rib, 6 x 10mm rib and 3 x 17mm rib versions.
FUNCTIONS & OPERATIONS
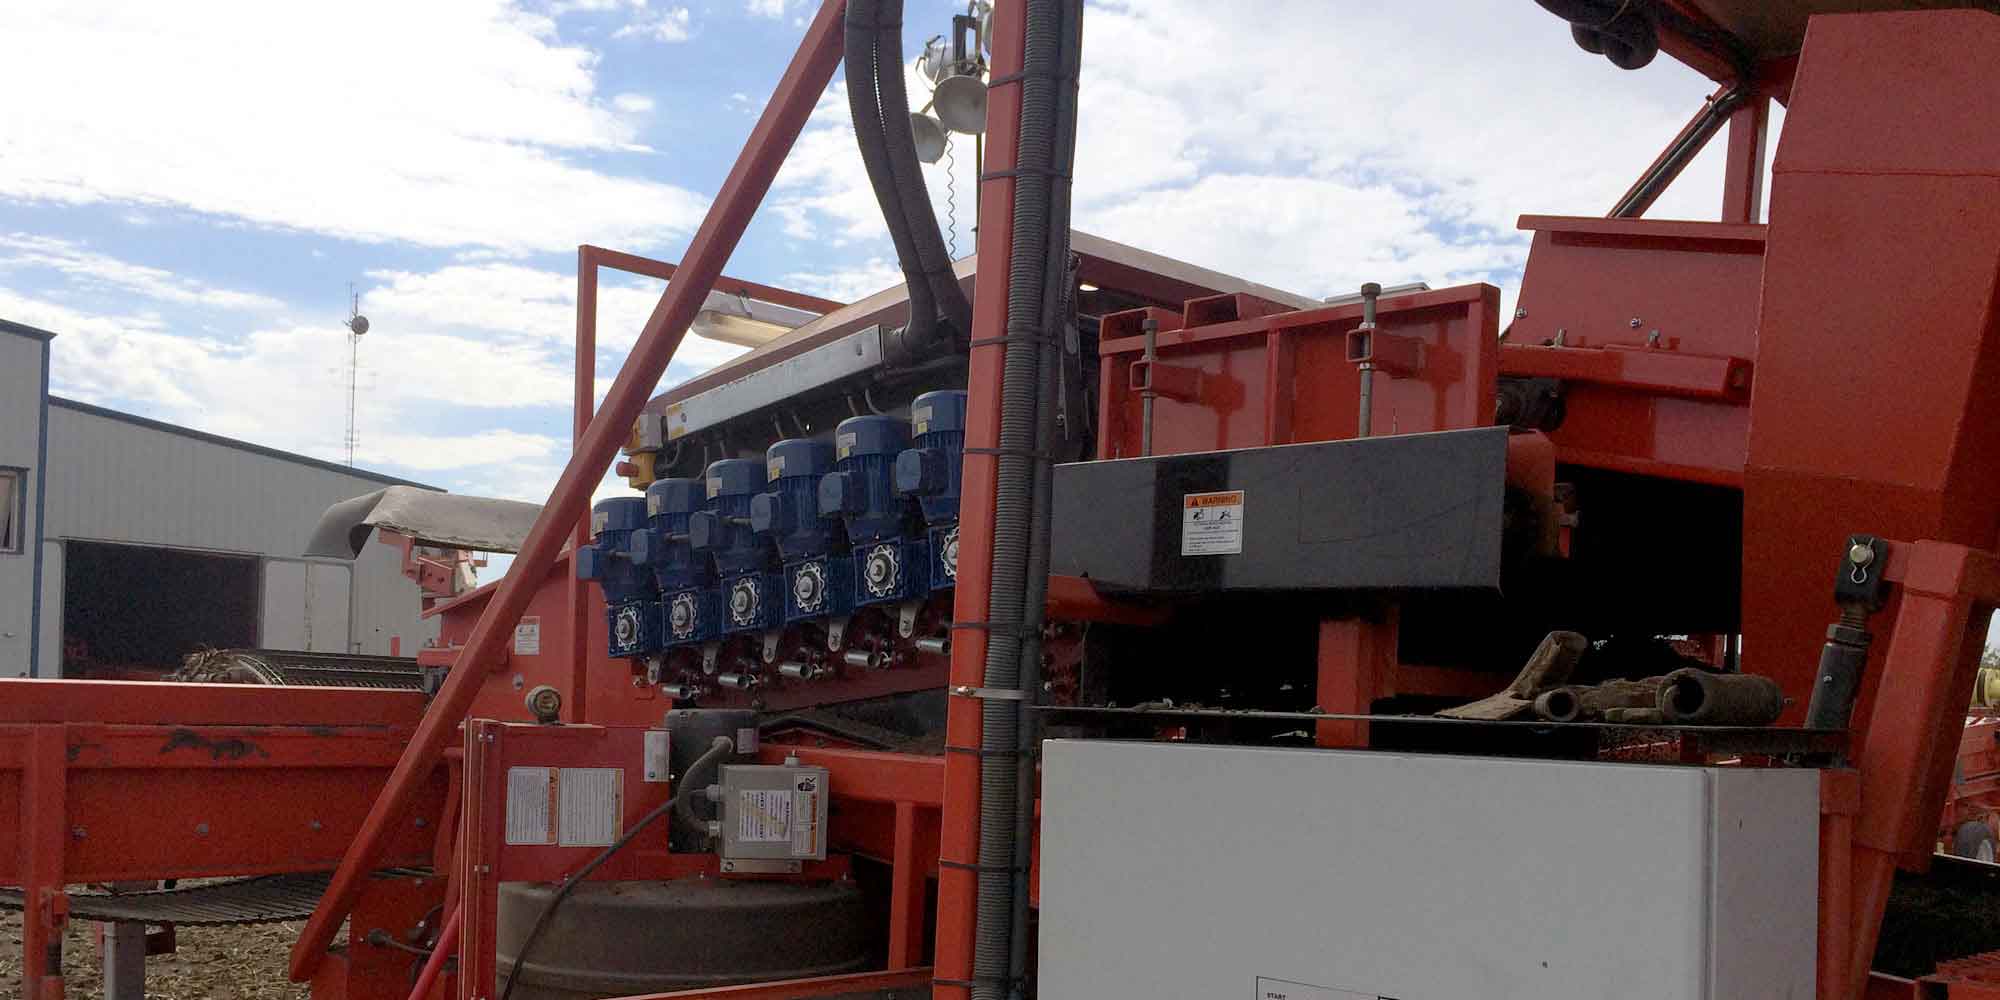
1. Spiral Shaft
The spiral shafts consist of up to 14, 6 fluted spiral segments per shaft. The spiral shafts are fixed in position and cannot be moved.
In order to remove a spiral shaft (for replacement of spiral segments), there is a plate bolted to the main side panel which when removed, allows the shaft to be drawn straight out of the side.
Chain adjustment for the transfer roller drive is not necessary as this operation is performed by the self-adjusting chain tensioner which should be set pre-tensioned.
2. Clod Rollers
The clod rollers are held in position by a hanger which is fixed to the up/ down adjustment profile using a circlip. The clod rollers are adjustable up and down as well as left to right in order to increase/ decrease to gap between spiral and clod roller to achieve more/ less separation.
There is a scraper positioned under each clod roller to keep the roller free from soil etc. sticking to it. It is important that these scrapers are correctly adjusted with a minimum gap of 3 mm.
Direction of rotation is an important factor. The unit is supplied with the option of running the clod roller in either direction .If the direction of the clod roller is needed to be changed for any reason we strongly recommend the scrapers are turned around at reset to their 3mm gap for correct scraping of the roller. Warranty claims will not be upheld if the scrapers are not correctly fitted for their use.
3. Spring tension adjustment for the clod rollers
Clod rollers should not “spring away” excessively only to allow larger particles to pass through such as stones 1” or greater.
Spring tension is usually set at the factory but if more tension is required or if springs are replaced etc the tension on each spring can be adjusted by the M12 studs located below each clod roller. First loosen the locking nut then adjust with a 19mm spanner to the required position, you may find that this will alter the gap between the clod roller and the spiral roller which will affect the separating of the machine. Therefore it is important to adjust all other spring tension adjusters to obtain equal gaps throughout the machine.
4. Clod roller height Adjustment
In order to adjust the Clod Roller height, there is a turnbuckle adjuster or a linear ram located on the top edge of the main panel. To adjust the height, lengthen the turnbuckle to lower the clod rollers and shorten it to lift the rollers. It is advisable to adjust the turnbuckle in small amounts to avoid jamming of the movement.
As the turnbuckle adjust both sides of the machine at once, both left and right settings will remain equal.

5. Clod roller gap Adjustment
Adjustment of the gap is achieved by firstly loosening the 2 x M12 pinch bolts and then turning the starwheel adjuster either forwards or backwards with a 19mm socket. This adjusts all of the clod rollers together, closer to or further away from the spiral rollers. Ensure the gap on both sides of the machine is adjusted equally by using the guide under the pointer. The spring tension is not effected during this adjusting and therefore will not need re-adjusting. Remember to re-tighten pinch bolts after adjusting.
To fine tune the gap there is an M12 bolt which moves the clod rollers individually and increases the spring tension (as mentioned above).

6. Do’s and dont’s
Never run the machine when the clod rollers are in contact with the spiral rollers (there must always be a gap present) or severe damage may occur!
If the clod rollers are in the extraction mode e.g. running in the opposite direction to the spiral rollers it is permitted to have the rollers touching. Care must be taken however in dry conditions as both rollers surface speeds should be similar as one may act as a brake against the other. In wet conditions the clod roller can be run at a much slower speed if required in the extraction mode.
GETTING THE BEST RESULTS
Do not attempt to adjust the settings of the machine until you have read and understood this information.
Summary
There is an infinite set of adjustments available on this machine and care should be taken when adjusting parts of the machine. It is advisable only to alter 1 setting at once so to avoid confusing what is happening with the machine.
Shaft speeds
This has the most pronounced effect in terms of separation. Generally speaking the faster the spirals turn the less the machine will separate (ideally between 120 and 130 RPM). The aim is to run the spiral shafts at the minimum speed to achieve maximum separation without loss of the crop.
To help achieve this it is possible to run the clod rollers at different speeds: faster for maximum extraction, and slower for less separation (this can be as little as 30 RPM).
Clod roller Adjustment
The clod rollers become more aggressive at separating when they are in a higher position and much less when lowered. When separating large particles such as clods of earth, a higher position for the clod roller allows such debris to stall for a while which will allow the flutes of the spiral rollers to grind down the clod.
The gap adjustment is also critical and once set to a minimum will eliminate the loss of a small crop such as salad potatoes or baby carrots and dramatically improve self-cleaning on sticky soils.
Clod roller direction
For root crops such as carrots parsnips, onions, shallots, bulbs etc we recommend that clod rollers run in the same direction as the spiral rollers.
On main crop potatoes generally 2 or more of the clod rollers can be reversed, this will allow haulm to be extracted and larger clods depending on the level of debris.
In Summary (for contra rotating)
Maximum separation
- Reduce speed of spiral rollers
- Increase speed of clod rollers
- Lift clod rollers up
- Increase gap between spiral and clod roller (Can reduce self-cleaning in wet conditions)
Minimum separation
- Increase speed of spiral rollers
- Decrease speed of clod rollers (or change direction to forward)
- Lower clod rollers
- Decrease gap between spiral and clod roller